
Flashing Tutorial
This tutorial is for flashing. Before you start flashing,
- Please contact the after-sales personnel.
- You must first confirm the device model.
- The main network port of the box should be connected to the router (for m1, the main network port is for internet access; for m2, the main network port is eth0). If the models do not match, it will cause the device to brick. Check the version in [System Settings] - [Device Upgrade] and view the current version. The following image shows the ks968-m2 model:
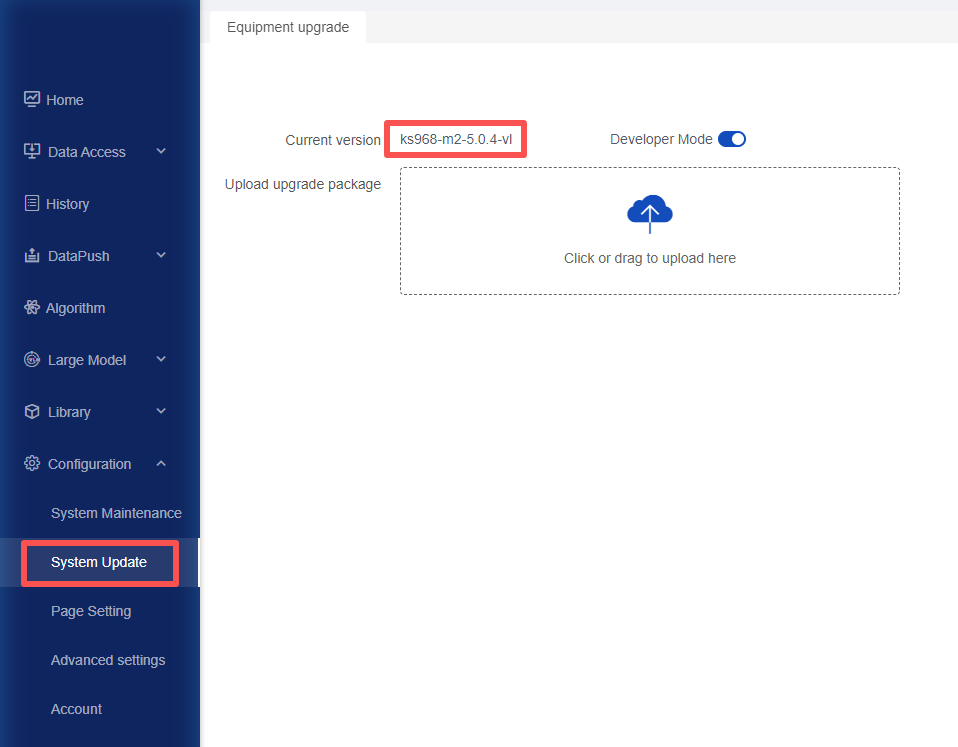
- If the current version is ks968-m1-xx, please refer to the ks968-m1 flashing tutorial.
- If the current version is ks968-m2-xx, please refer to the ks968-m2 flashing tutorial.
ks968-m1 Flashing Tutorial
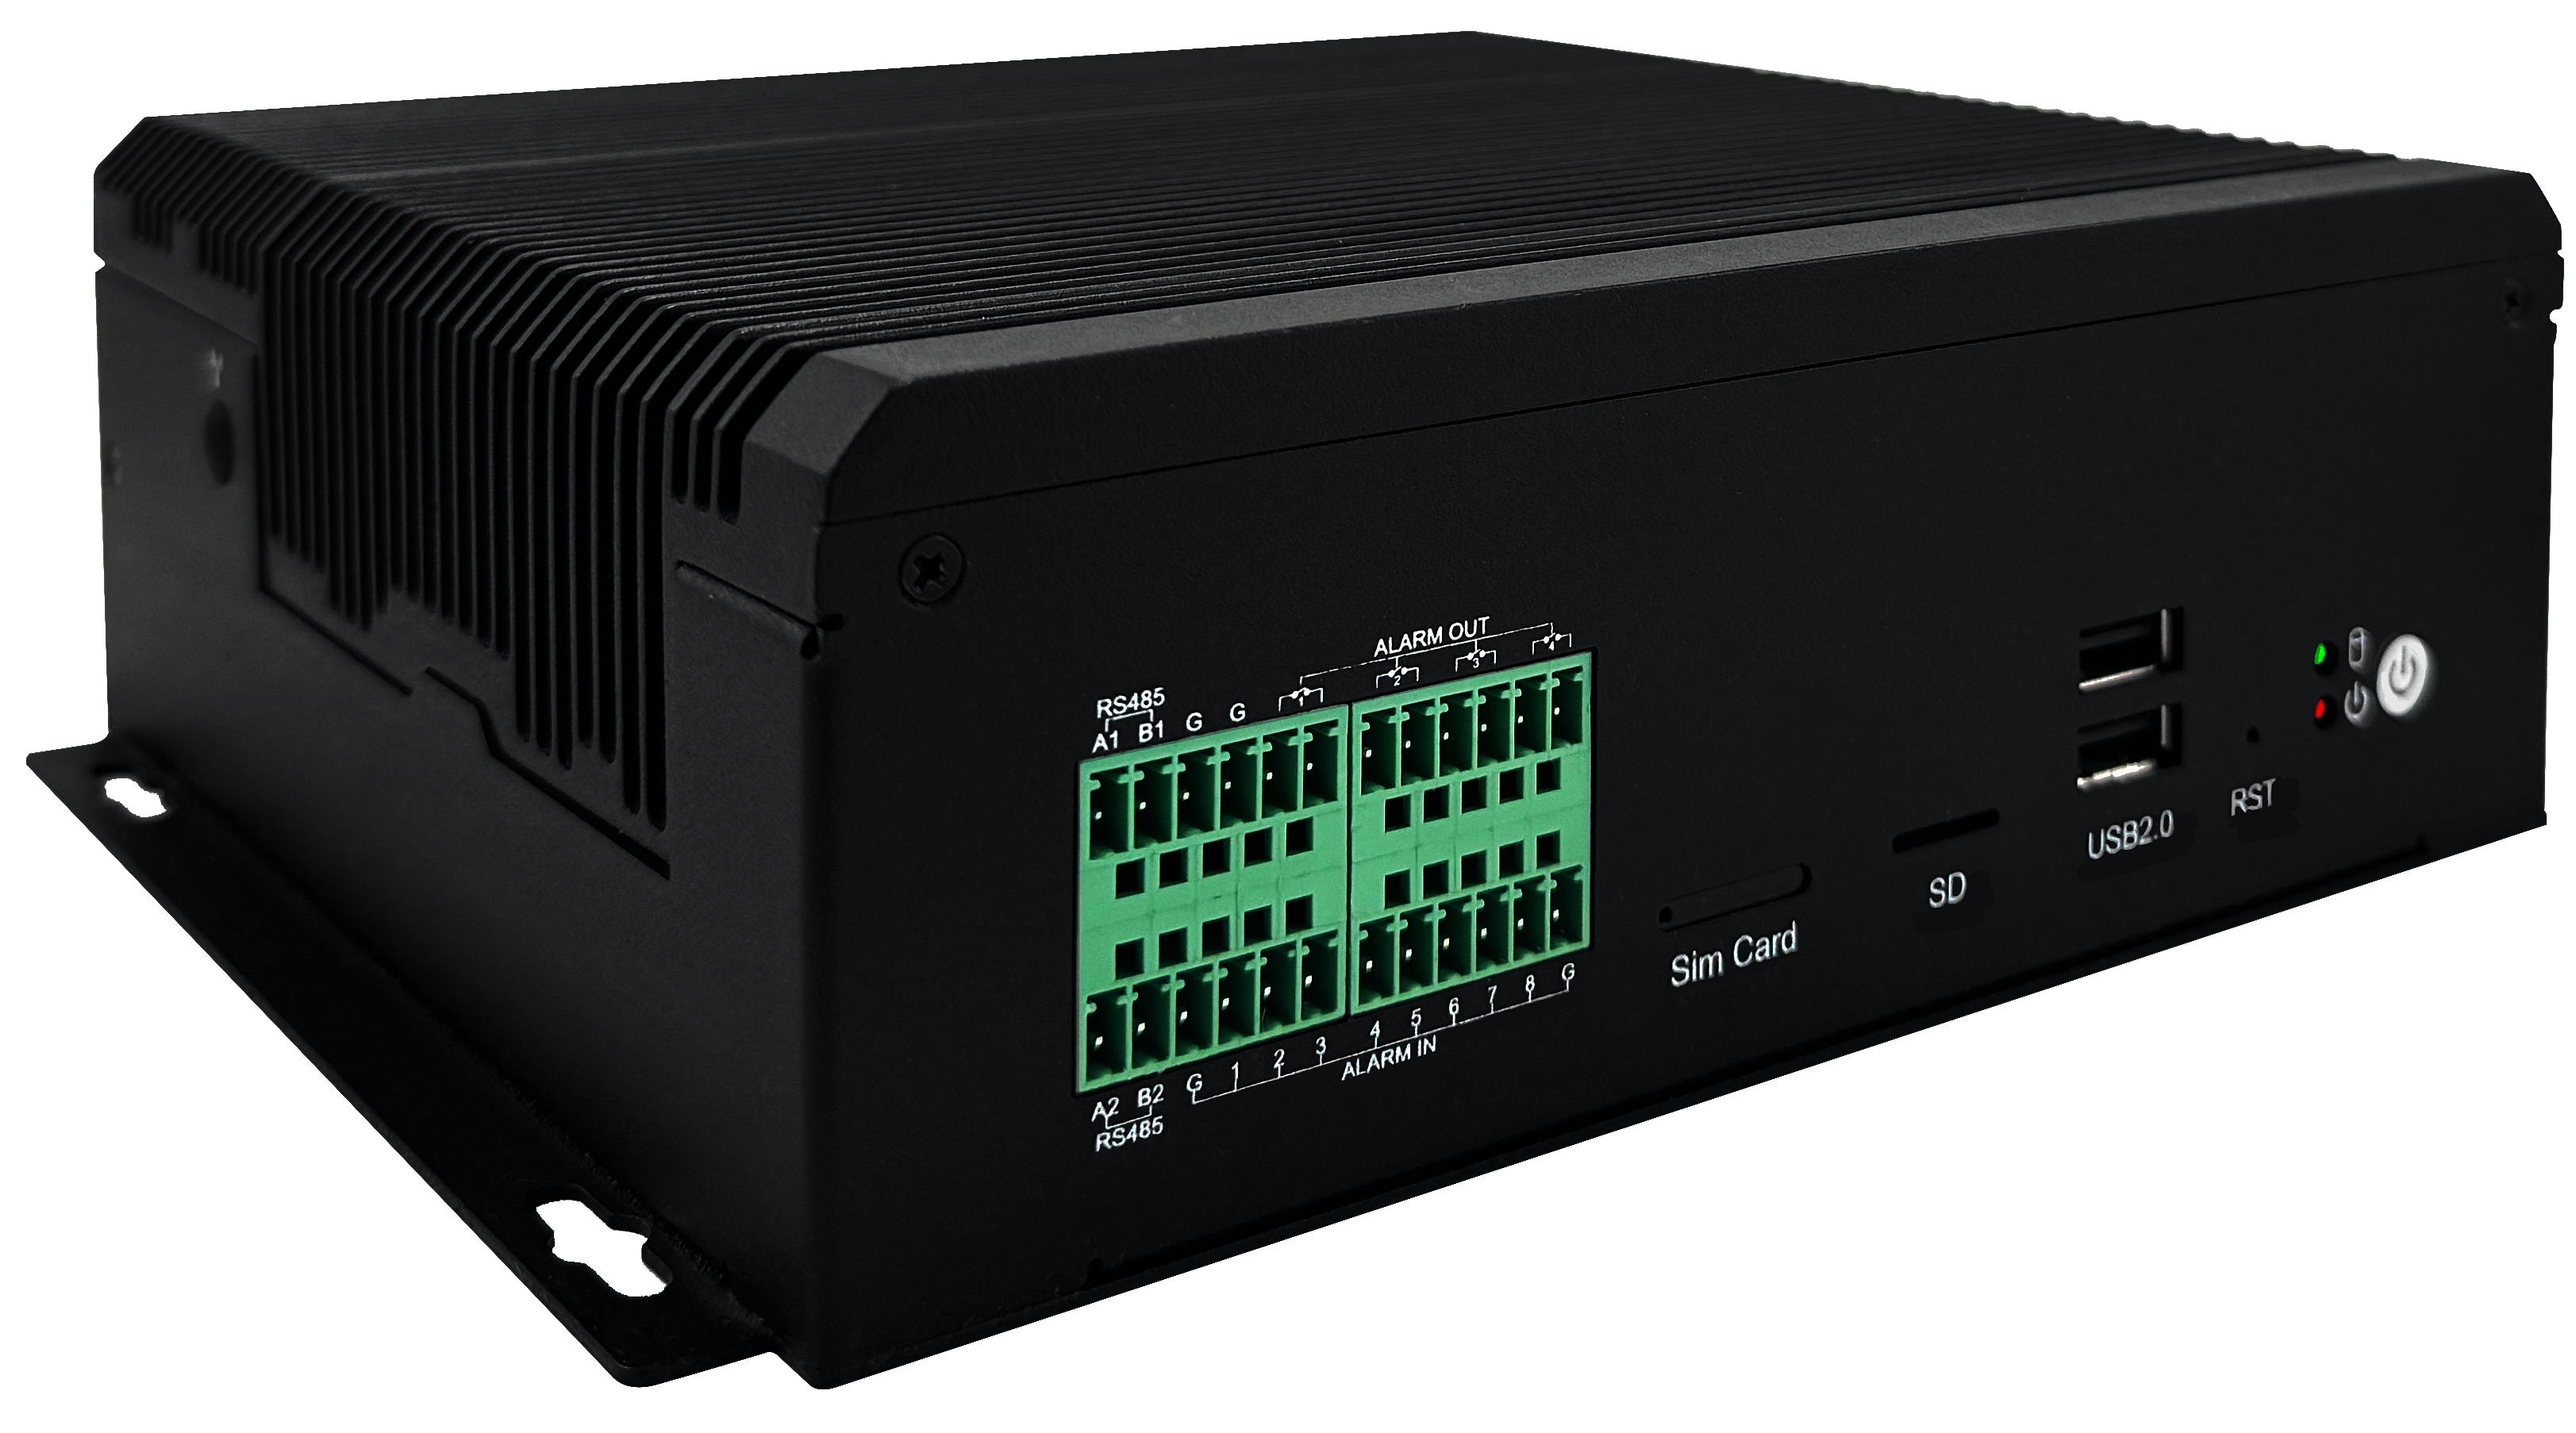
Confirm the Box Appearance
Before flashing the ks968-m1, please confirm that the box appearance is as shown in the following image:
Material Preparation
Computer, HDMI monitor, USB cable (dual-head USB cable), router (must have internet), keyboard, Ethernet cable (one end connected to the router)
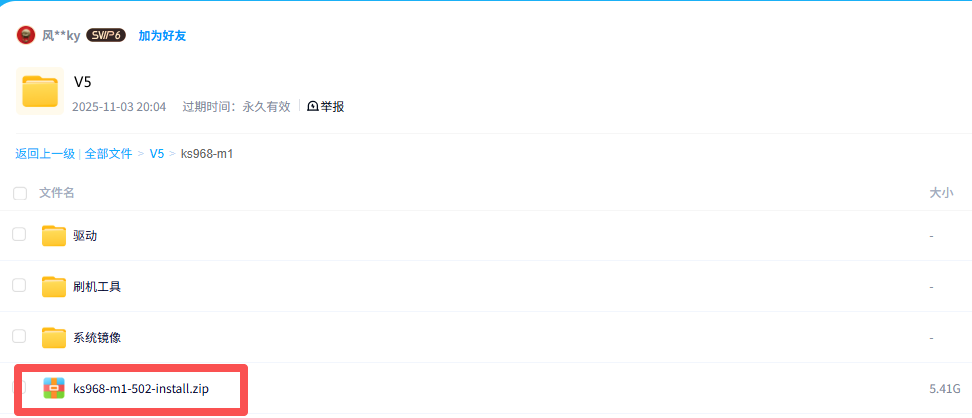
Drivers, flashing tool, system image, and installation package
https://pan.baidu.com/s/1HHjL-X0mc95gkgLj5G5RtA Extraction code: 0000
You need to enter the ks968-m1 folder to download the above software.
Note: The cloud drive contains multiple ks968-m1-xxx.zip (installation packages). Choose the version you need and whether it includes a large model. Download only one installation package. If the purchased box does not include a large model and you force the installation of a large model version, the device may become unusable.
Install Drivers
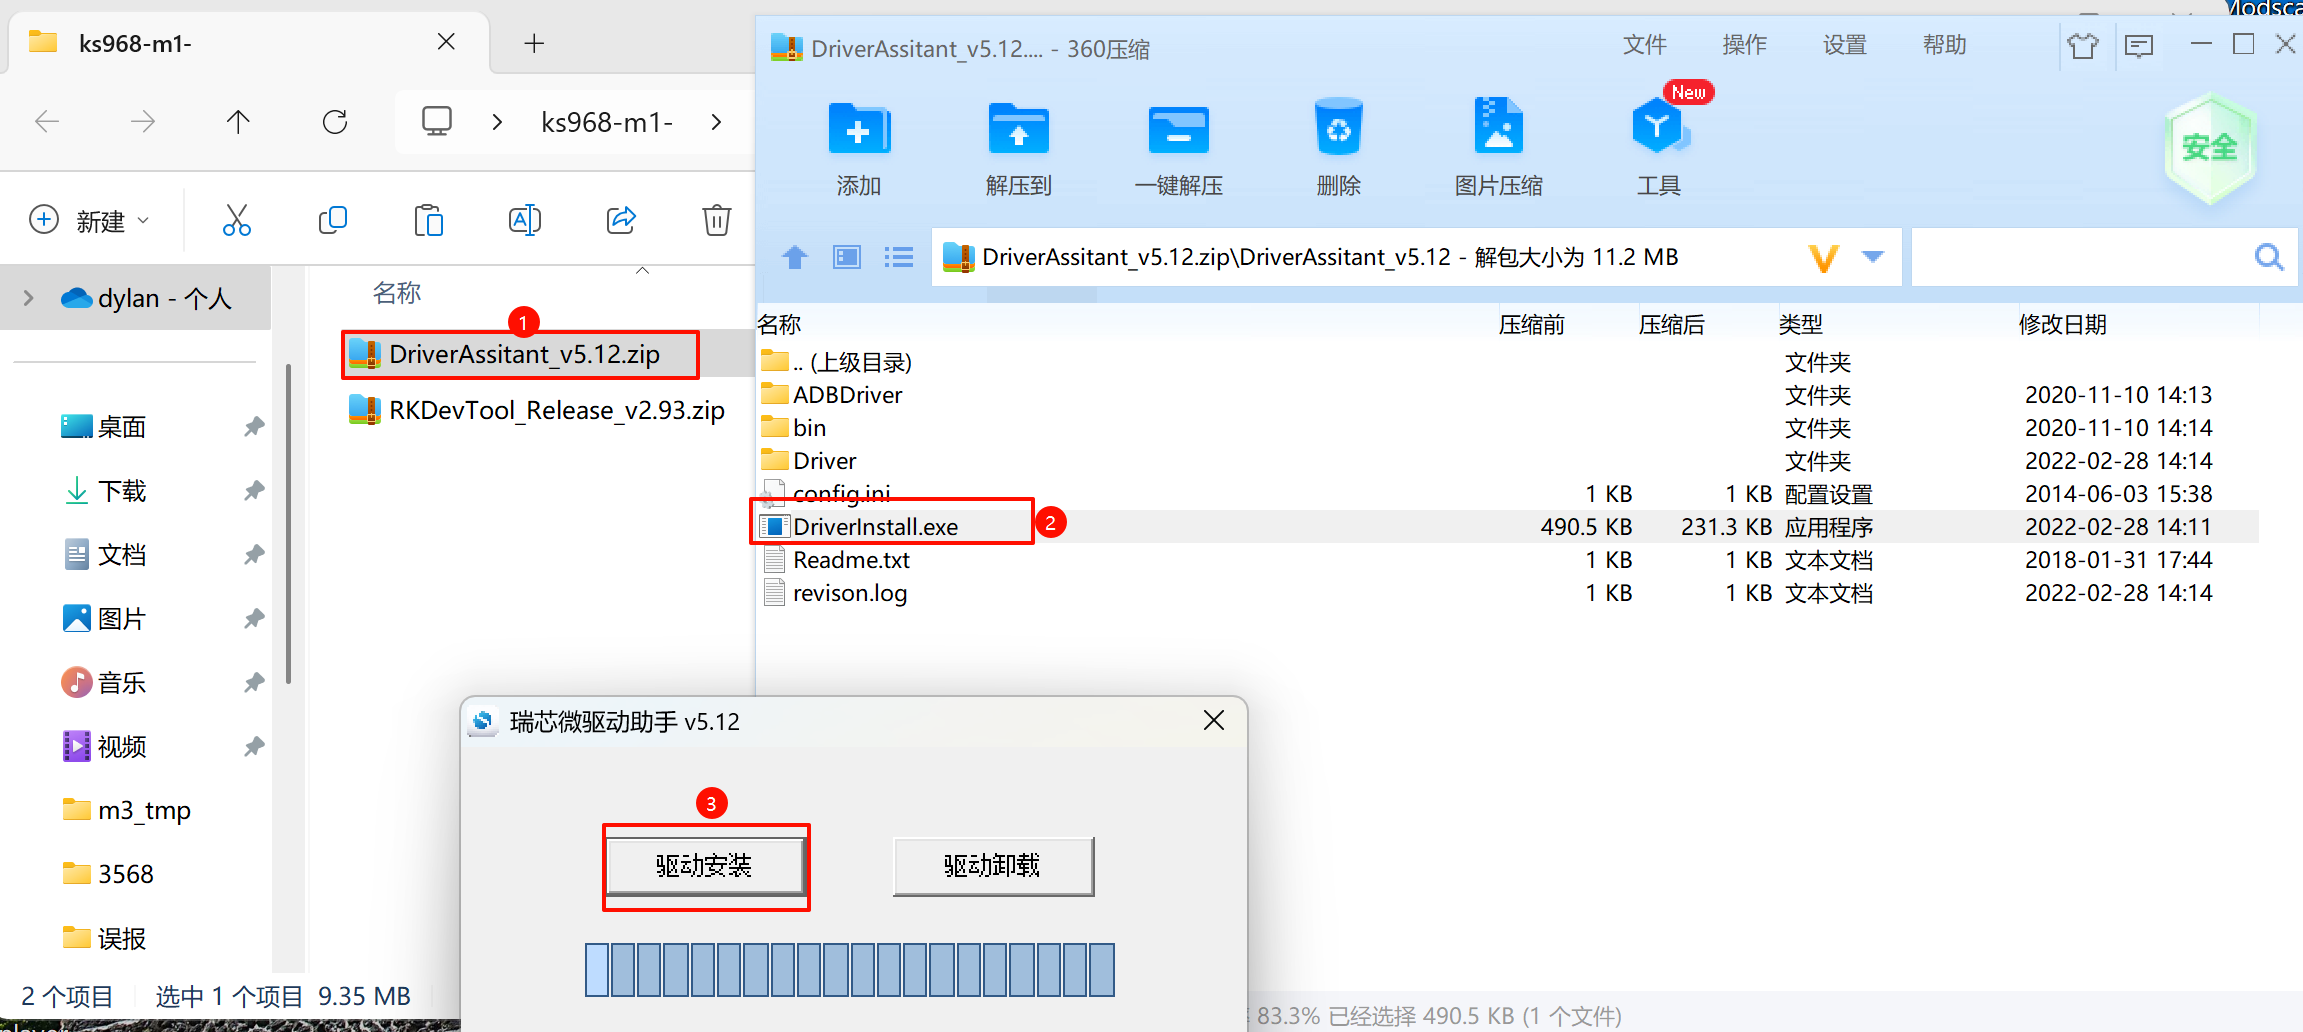
Enter the driver folder to install the drivers.
Flashing
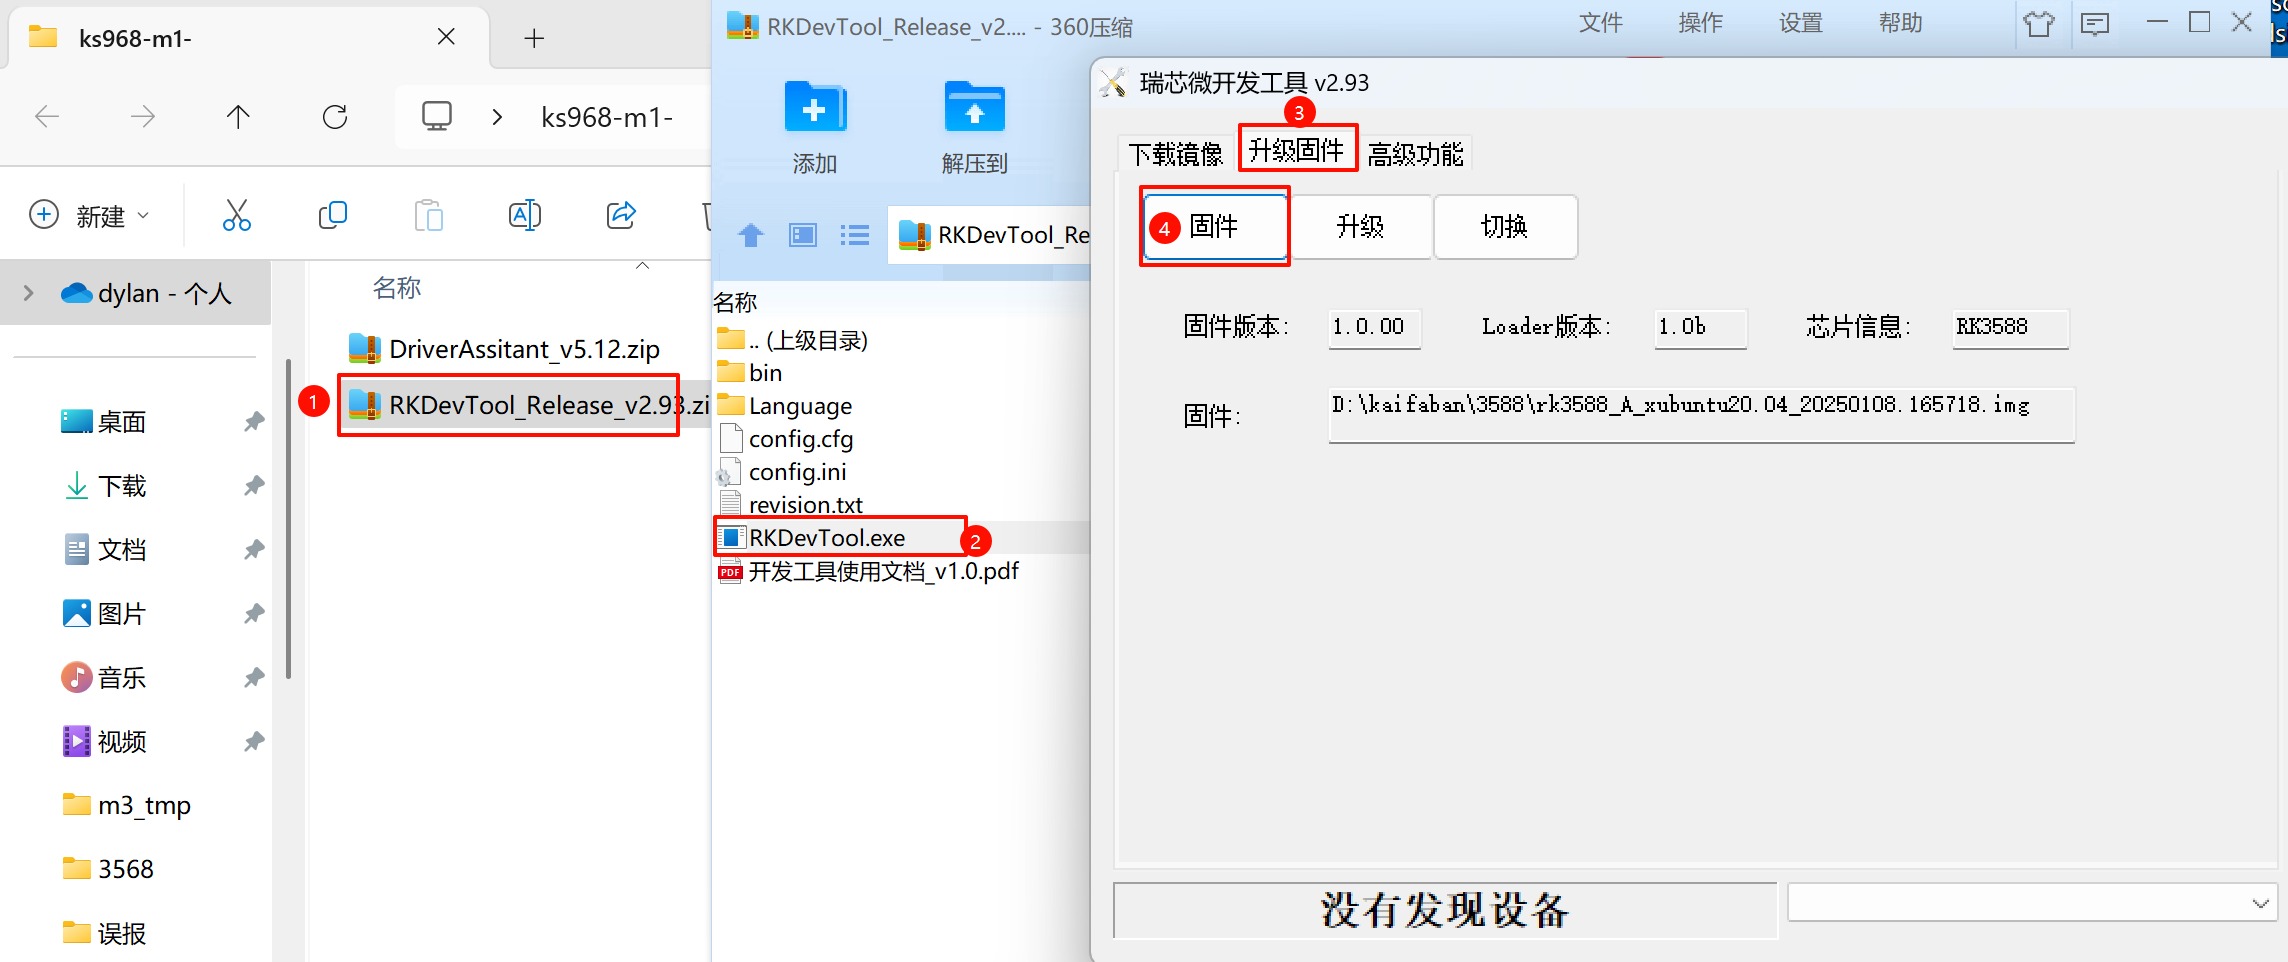
- Enter the flashing tool folder, open the flashing tool, and click on firmware to select the system image file, as shown in the following image:
-
Power on the box, connect one end of the dual-head USB cable to the computer and the other end to the USB3.0 port at the back of the box. Connect the box to the monitor via HDMI, and connect the keyboard through another USB port. Plug the Ethernet cable into the internet port of the box and the other end into the router.
-
Log in to the box with user
zqland password123456, then pressctrl+alt+tto open the command window and enter the commandsudo reboot loaderand press Enter. -
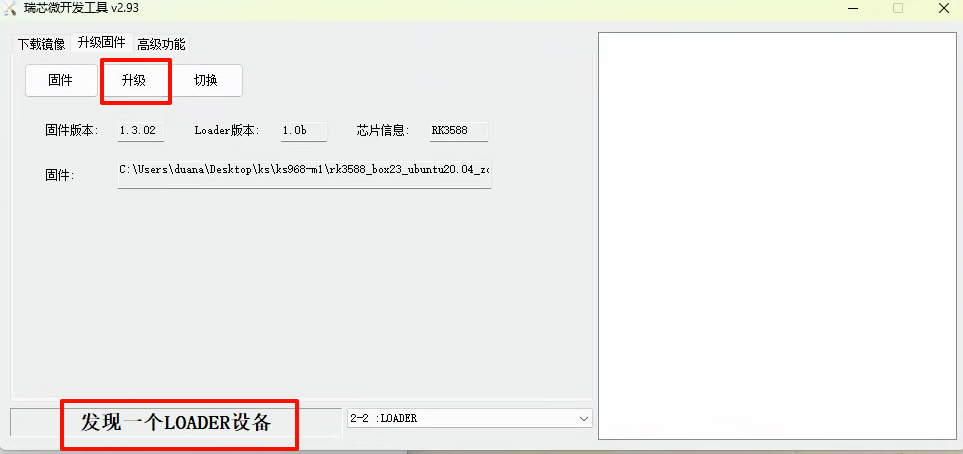
Wait for a moment. When the flashing tool prompts "Found a LOADER device," click the Upgrade button. Wait until the firmware download is complete.
Software Installation
- After the firmware download is complete, log in to the box again with user
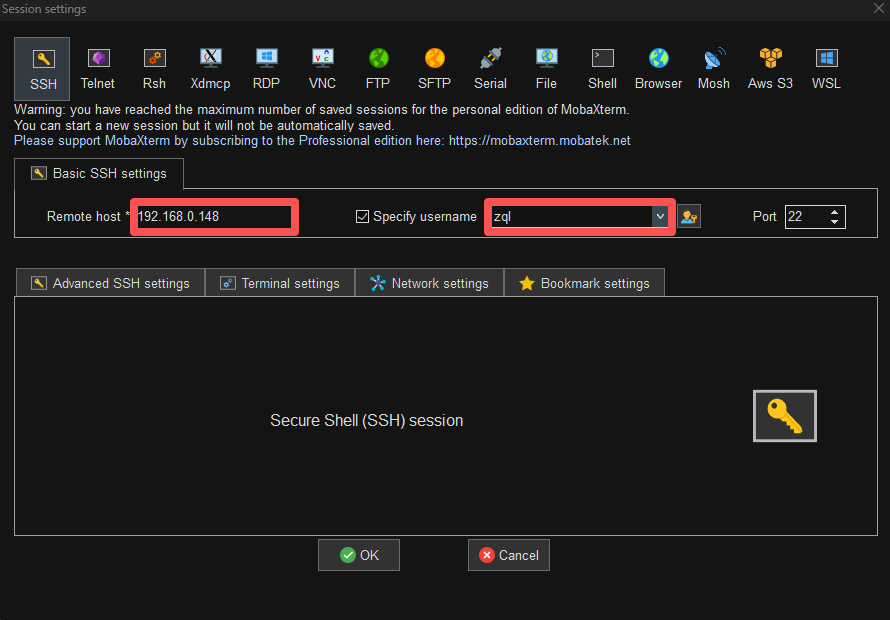
zqland password123456. Pressctrl+alt+tto open the command window and enterifconfigto check the IP address of the eth0 port. - Use an SSH tool to connect to the box. Input the IP address in Remote host, and input
zqlin Specify usernames, as shown in the following image (MobaXterm is recommended, download link: https://mobaxterm.mobatek.net/download-home-edition.html )
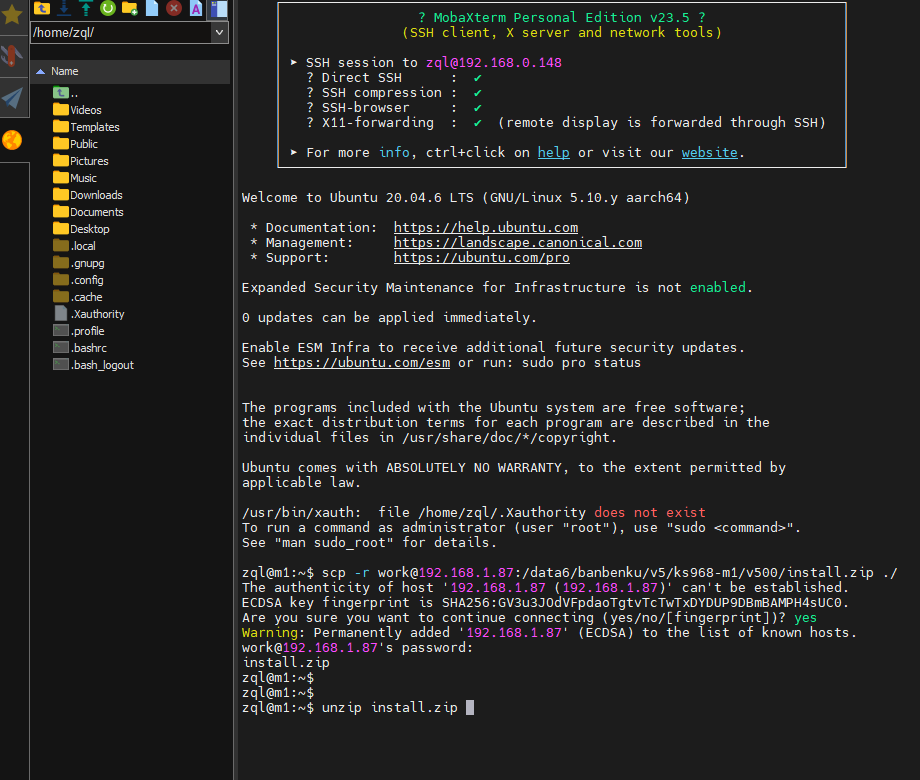
 3. Upload the install.zip (you can rename the downloaded ks968-m1-xxx.zip to install.zip) to home/zql, and enter
 unzip install.zip to unzip it. (After unzipping, execute sudo rm -r install.zip to delete the installation package.)
- After unzipping, enter
rm install.zipto delete the installation package, then entercd install/package/to navigate to the directory and enterbash install.shto wait for the installation (approximately ten minutes). - After the installation is complete, enter
sudo rebootto restart the device.
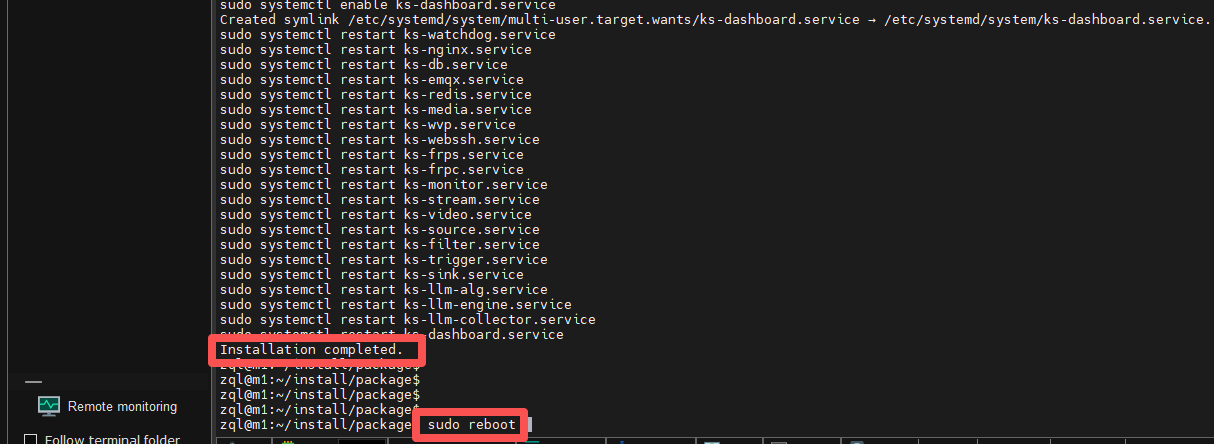
- The default IP address after installation is 192.168.1.65. Access it through a browser using the IP address, with the default username and password being admin/123456.
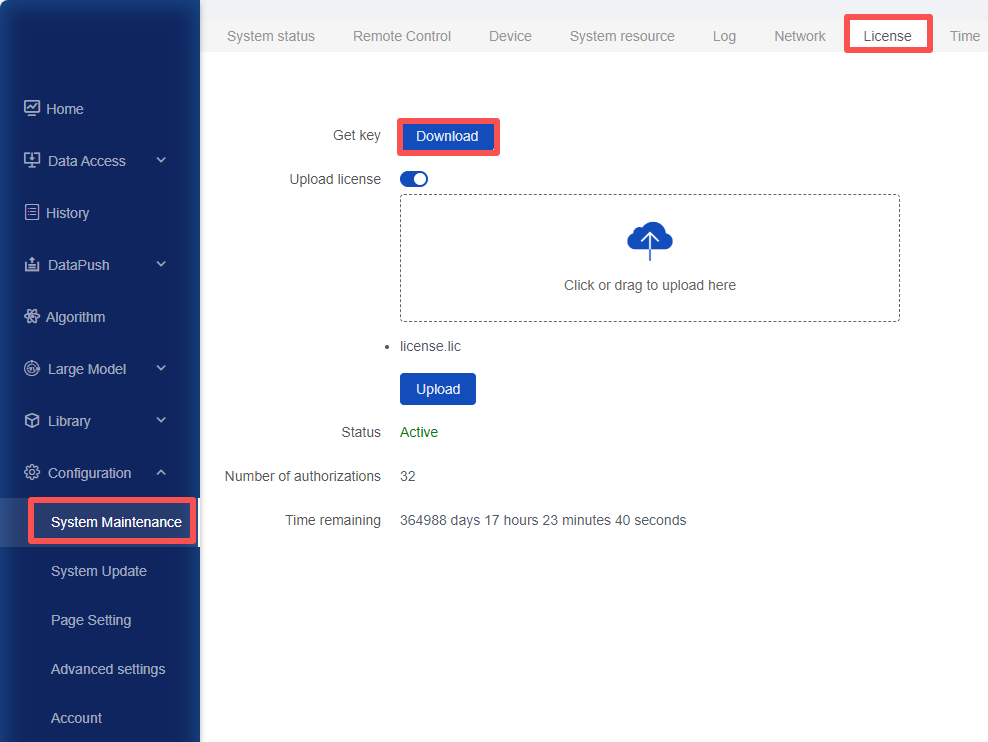
- For authorization, copy the key and contact the after-sales personnel.
KS968-m2 Flashing Tutorial
Confirm the Box Appearance
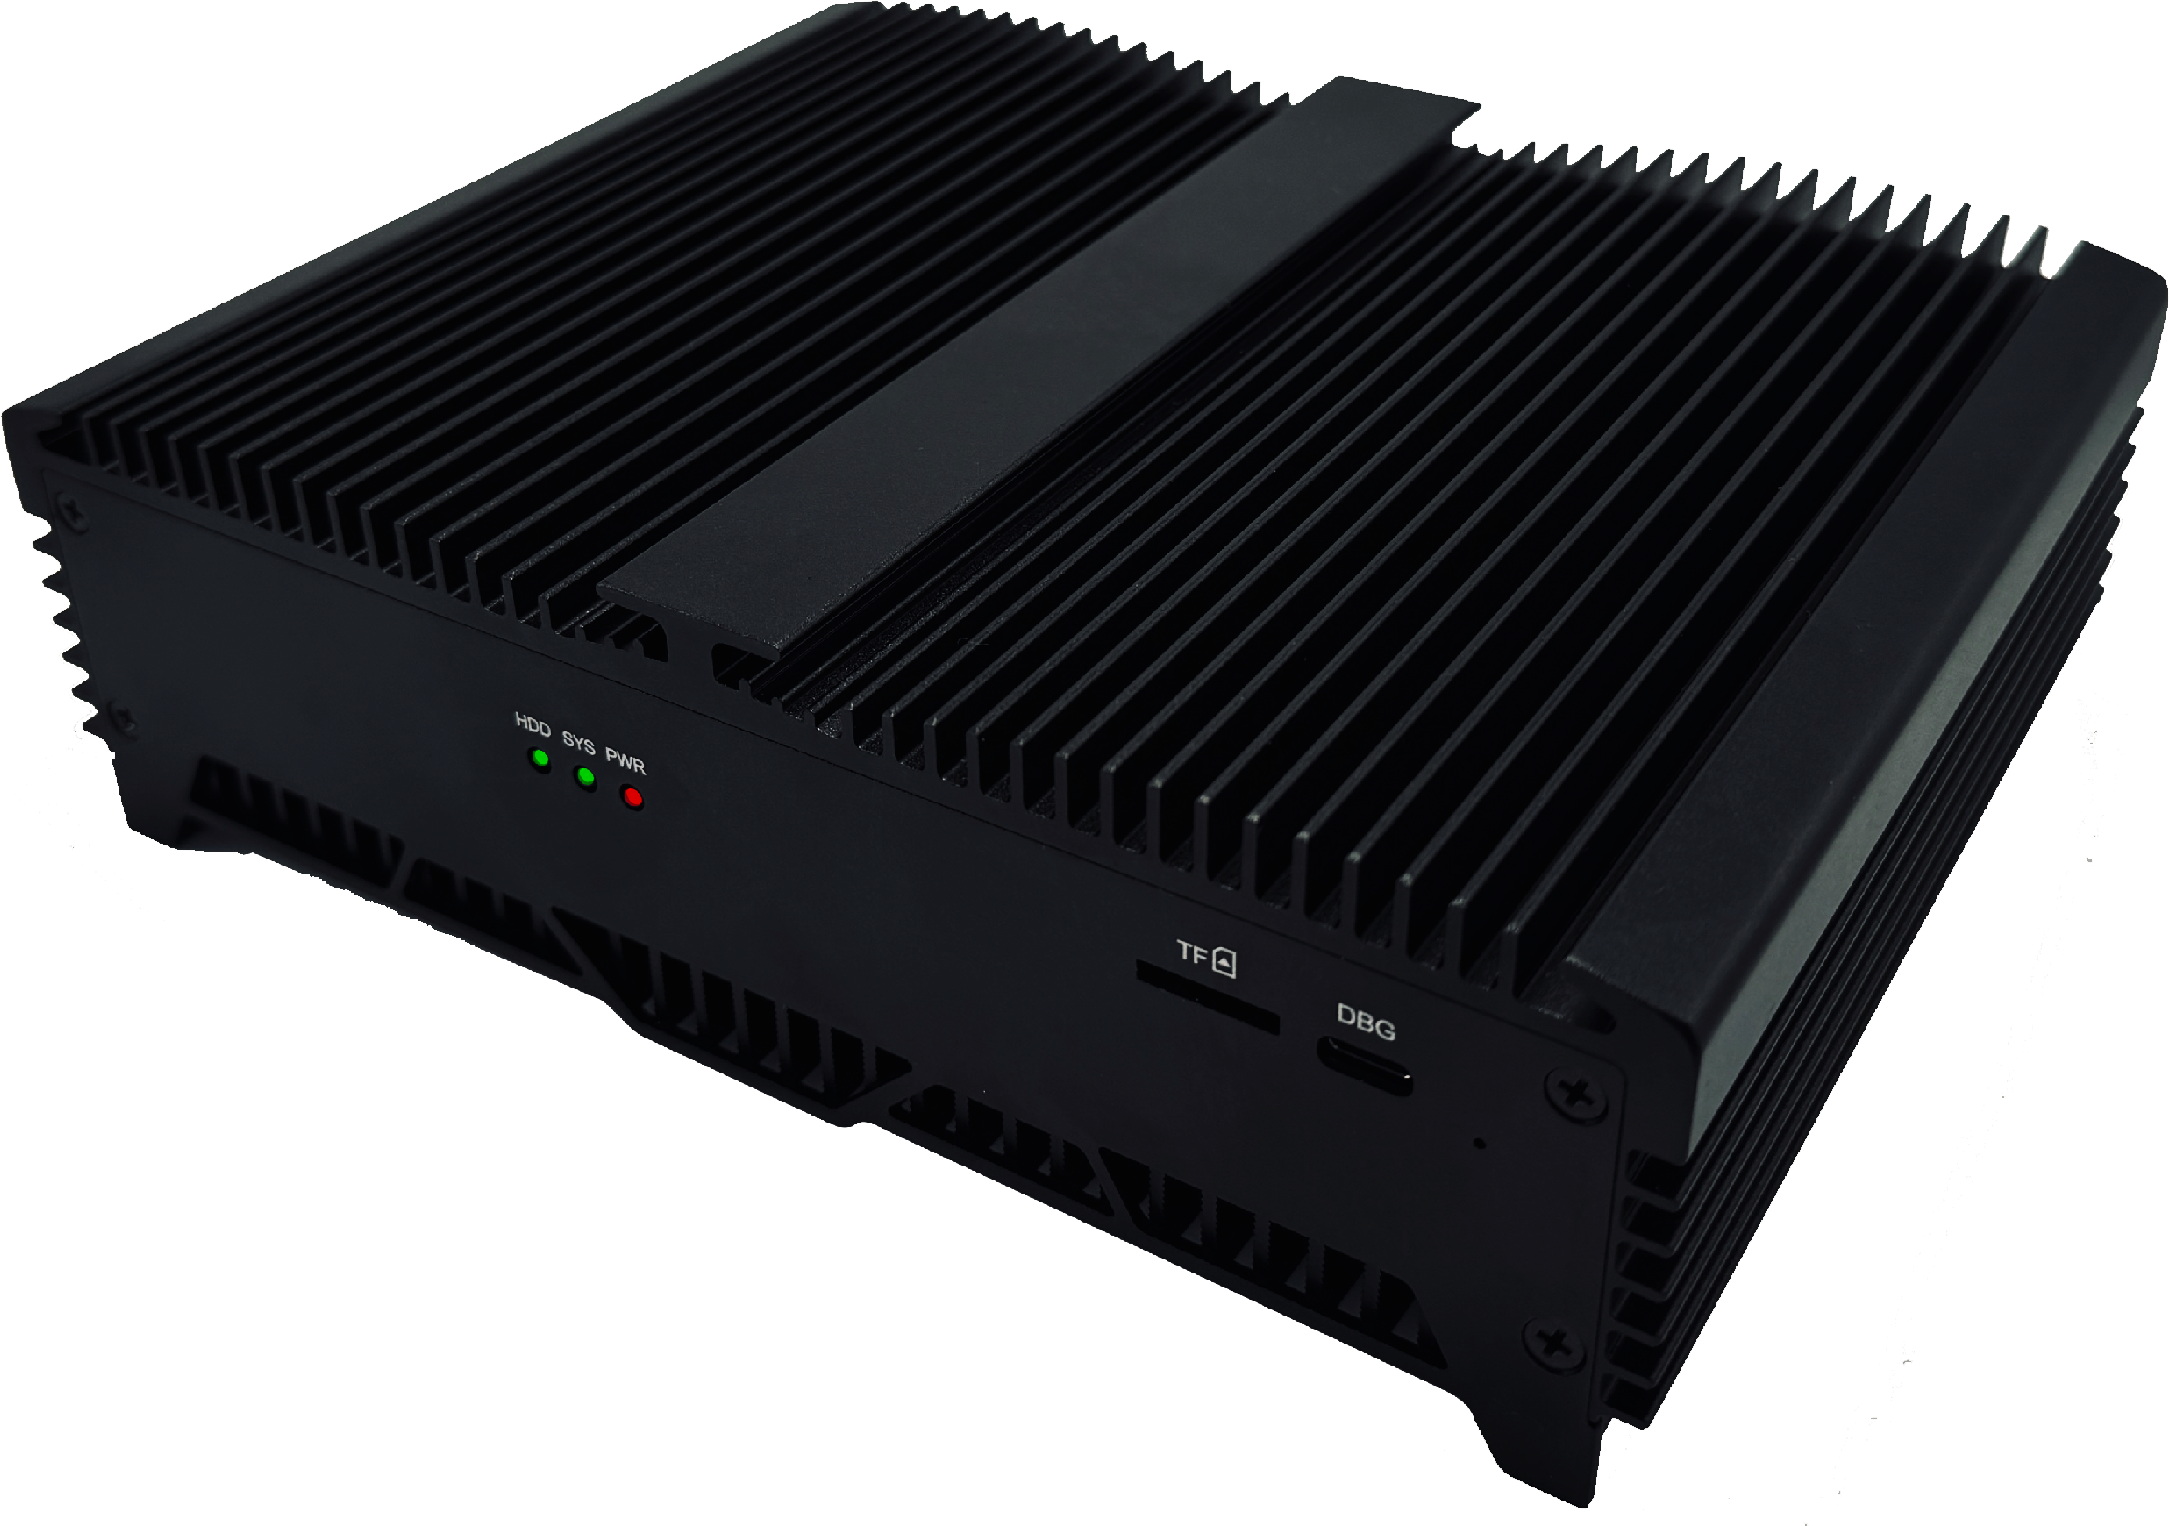
Before flashing the ks968-m2, please confirm that the box appearance is as shown in the following image:
Material Preparation
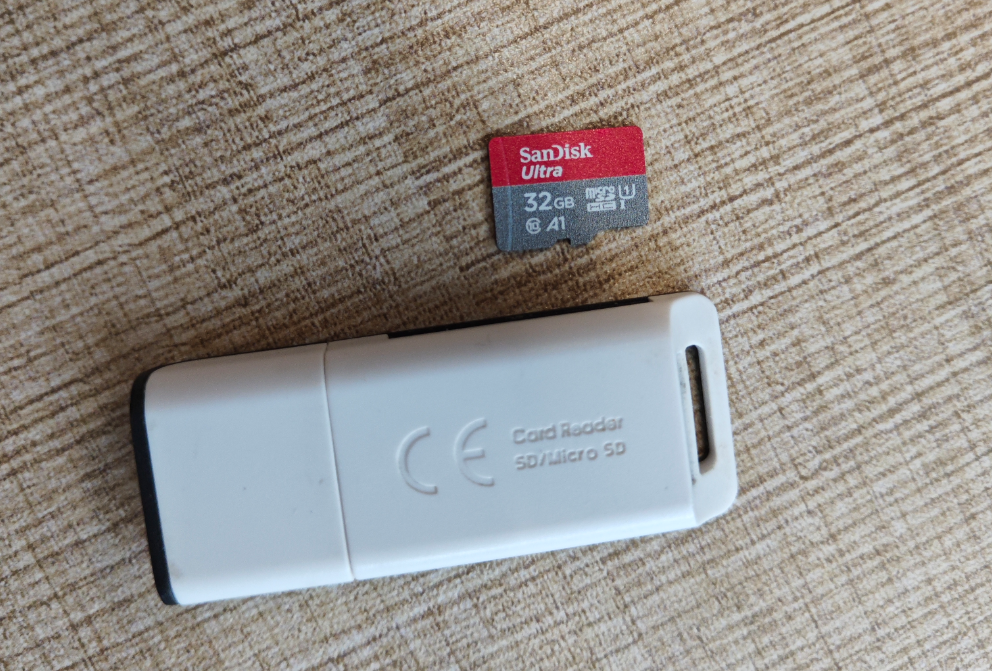
SD card (must be SanDisk brand, 32GB), SD card reader (USB port), router (must have internet), computer, HDMI monitor, Ethernet cable (one end connected to the router)
The SD card and reader are as shown in the following image:
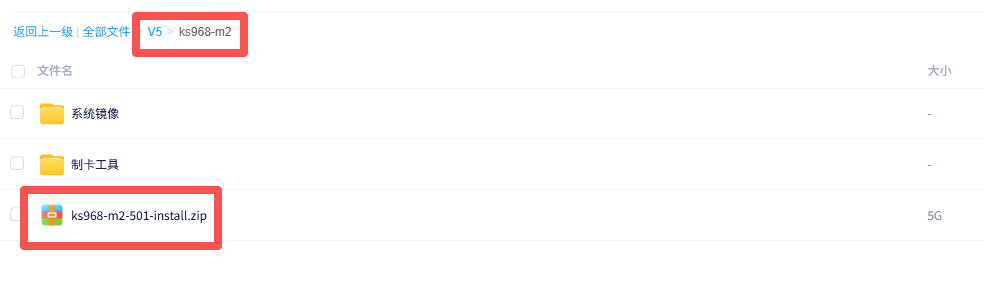
Card making tool, system image, and installation package
https://pan.baidu.com/s/1HHjL-X0mc95gkgLj5G5RtA Extraction code: 0000
You need to enter the ks968-m2 folder to download the above software
Note: The cloud drive contains multiple ks968-m2-xxx.zip (installation packages). Choose the version you need and whether it includes a large model. Download only one installation package. If the purchased box does not include a large model and you force the installation of a large model version, the device may become unusable.
Card Making
- Insert the SD card (32GB) into the computer via a USB card reader.
- Format the SD card in "My Computer" (default formatting method is fine).
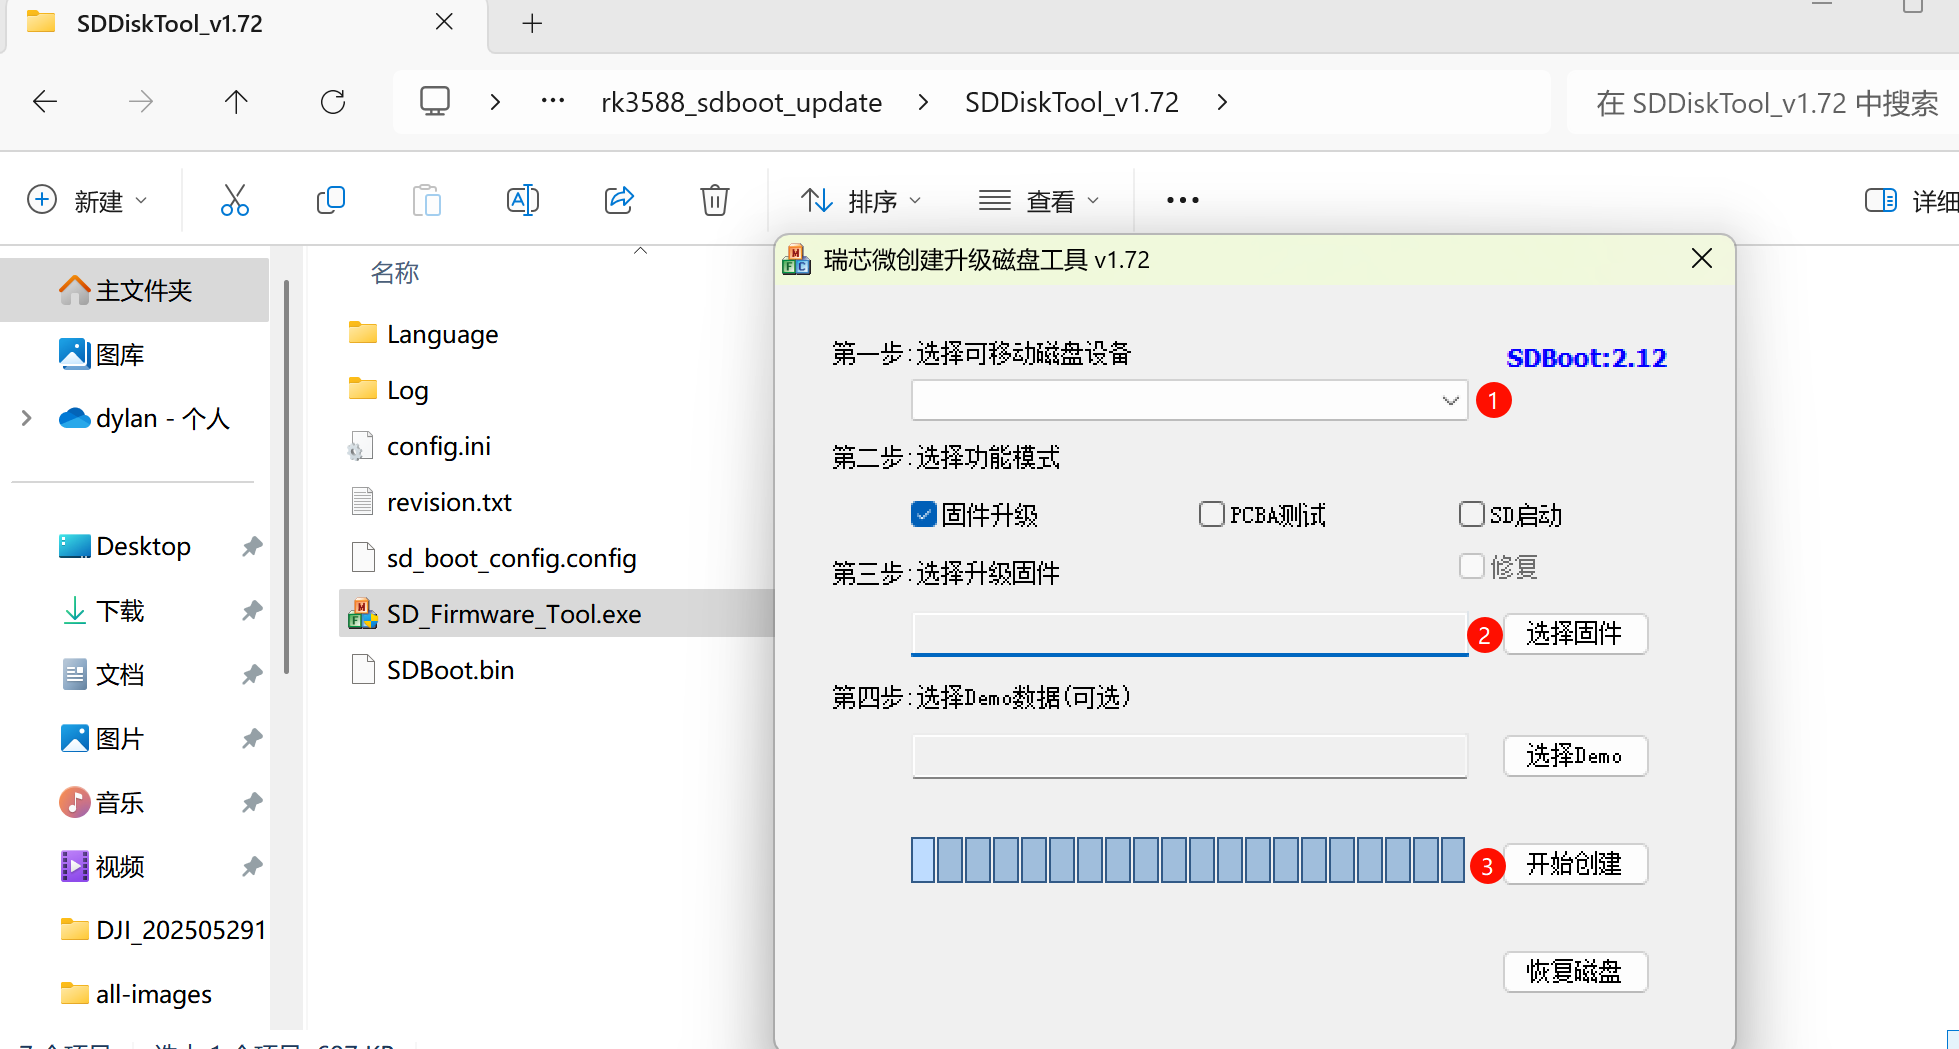
- After formatting, open the card making tool, select the SD card and firmware, and click Start to create. As shown in the following image:
Flashing
- Insert the SD card into the TF slot of the box (do not power on), connect the box's HDMI to the monitor, and connect the Ethernet cable to the box's eth0, with the other end connected to the router.
- Power on the box and wait for the flashing to complete (approximately five minutes, when the screen displays "Please remove SD card," the flashing is complete).
- Remove the SD card and wait for the box to restart. At this point, the login page will appear on the monitor. Log in with
zqland password123456. Then pressctrl+alt+tto open the command window and enterifconfigto check the IP address of the eth0 port.
Software Installation
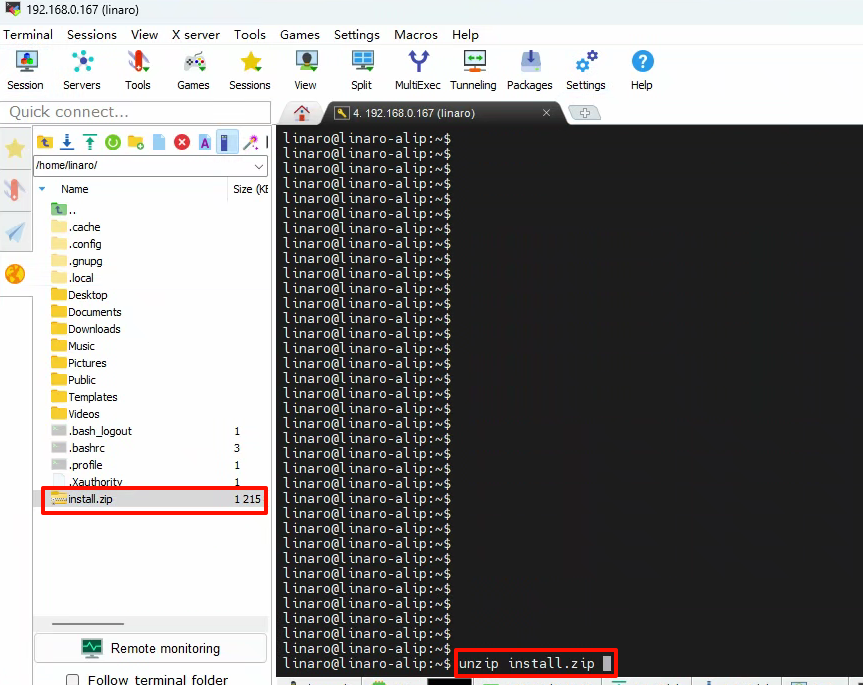
- Use an SSH tool to connect to the box (input the IP address queried in the previous step in Remote host, username is
zql), as shown in the following image: (Here, MobaXterm is recommended, download link: https://mobaxterm.mobatek.net/download-home-edition.html)
- Upload the install.zip (here, use install.zip, you can rename the downloaded ks968-m2-xxx.zip to install.zip) installation package to home/zql
- Create a temporary directory:
sudo mkdir -p /userdata/tmp; sudo chown -R zql.zql /userdata/tmp - Execute:
cd /home/zql; mv install.zip /userdata/tmp - Execute:
cd /userdata/tmp; unzip install.zip; cd install/package - Execute:
bash install.sh. - After successful execution, delete the installation package:
cd /userdata/tmp; rm -rf install; rm install.zip
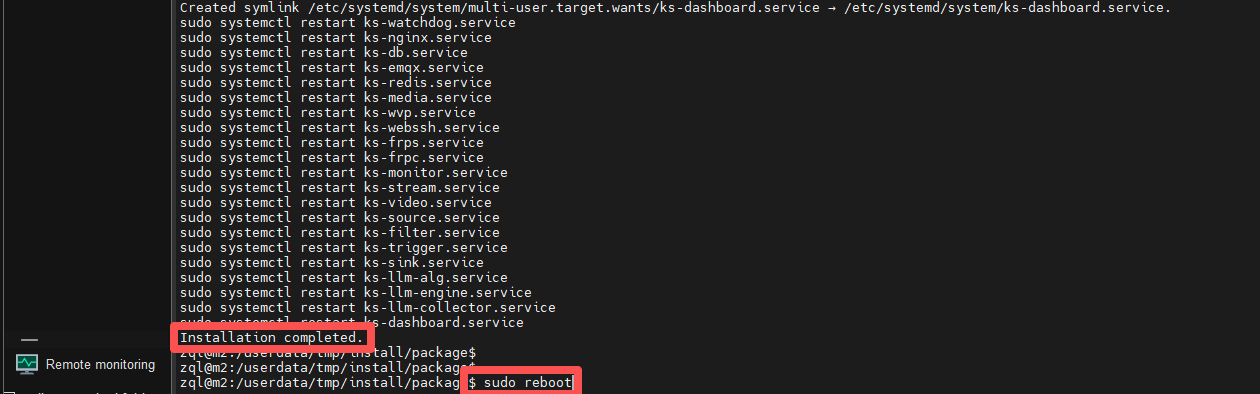 8. After installation, the default IP address is 192.168.1.65. Access it through a browser using the IP address, with the default username and password being admin/123456.
9. For authorization, copy the key and contact the after-sales personnel.
8. After installation, the default IP address is 192.168.1.65. Access it through a browser using the IP address, with the default username and password being admin/123456.
9. For authorization, copy the key and contact the after-sales personnel.
回复